Manage API Keys
Create and manage keys for external API access.
API keys let you access Respeak from external applications - for example, to send questions to an expert automatically or to retrieve data from your own system. You need an API key whenever you want to use the Respeak API outside of the web interface.
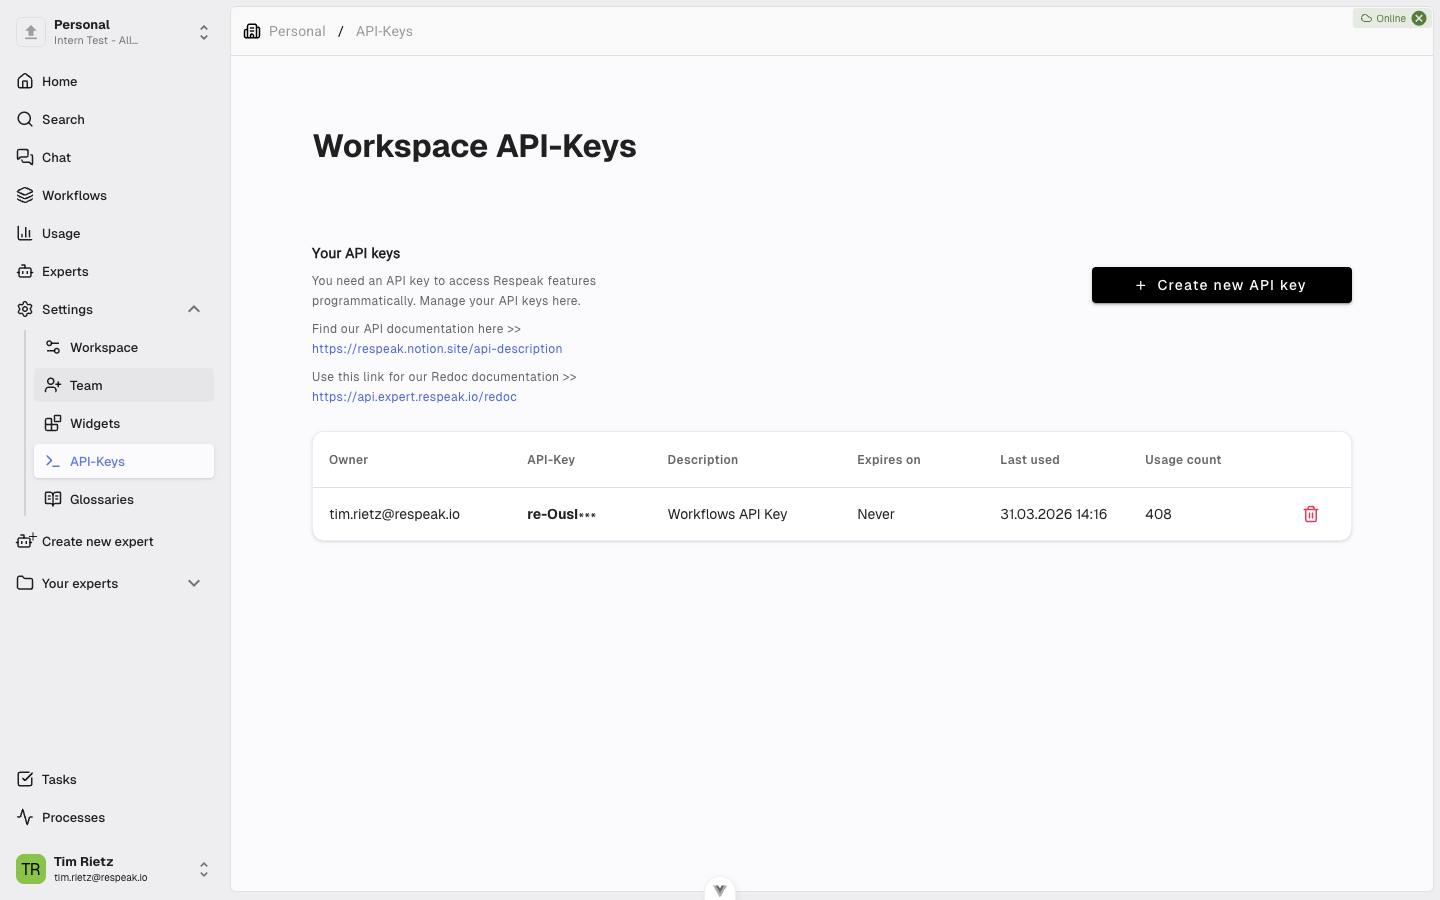
Open the API Key Settings
Open Settings
Open your workspace and click Settings in the sidebar.
Select API Keys
Select the API-Keys section.
You will see a table of all existing API keys. Each entry shows the creator, the first few characters of the key, the description, the expiration date, the last-used timestamp, and the usage count.
The full key is only shown once, immediately after creation.
Create a New API Key
Start creation
Click Create new API key.
Enter a description
Enter a description that explains the key's purpose (e.g. "CRM integration" or "Reporting automation").
Set an expiration date (optional)
Optionally set an expiration date. If you leave this empty, the key will remain valid indefinitely.
Create and copy the key
Click Create. Your new API key is displayed once.
Copy the key immediately by clicking the copy icon. For security reasons, the full key is only shown this one time. If you do not copy it, you will need to create a new key.
Delete an API Key
Click the trash icon next to the key you want to remove and confirm the action in the dialog that appears. The key becomes invalid immediately, and any application using it will no longer be able to access Respeak.
When to Use API Keys
API keys are useful when you want to integrate Respeak into your existing workflows - for example, sending automated queries to your experts from another system, integrating Respeak into your own applications or dashboards, or connecting to automation platforms.
You can find more details on using the API in the Respeak API documentation, which is linked from the API key settings page.