Upload Documents
Upload PDFs, images, audio, and video as knowledge sources.
With Respeak you can upload documents, images, audio, and video files so your expert can use them as a knowledge source. The files are processed automatically and added to your expert's knowledge base.
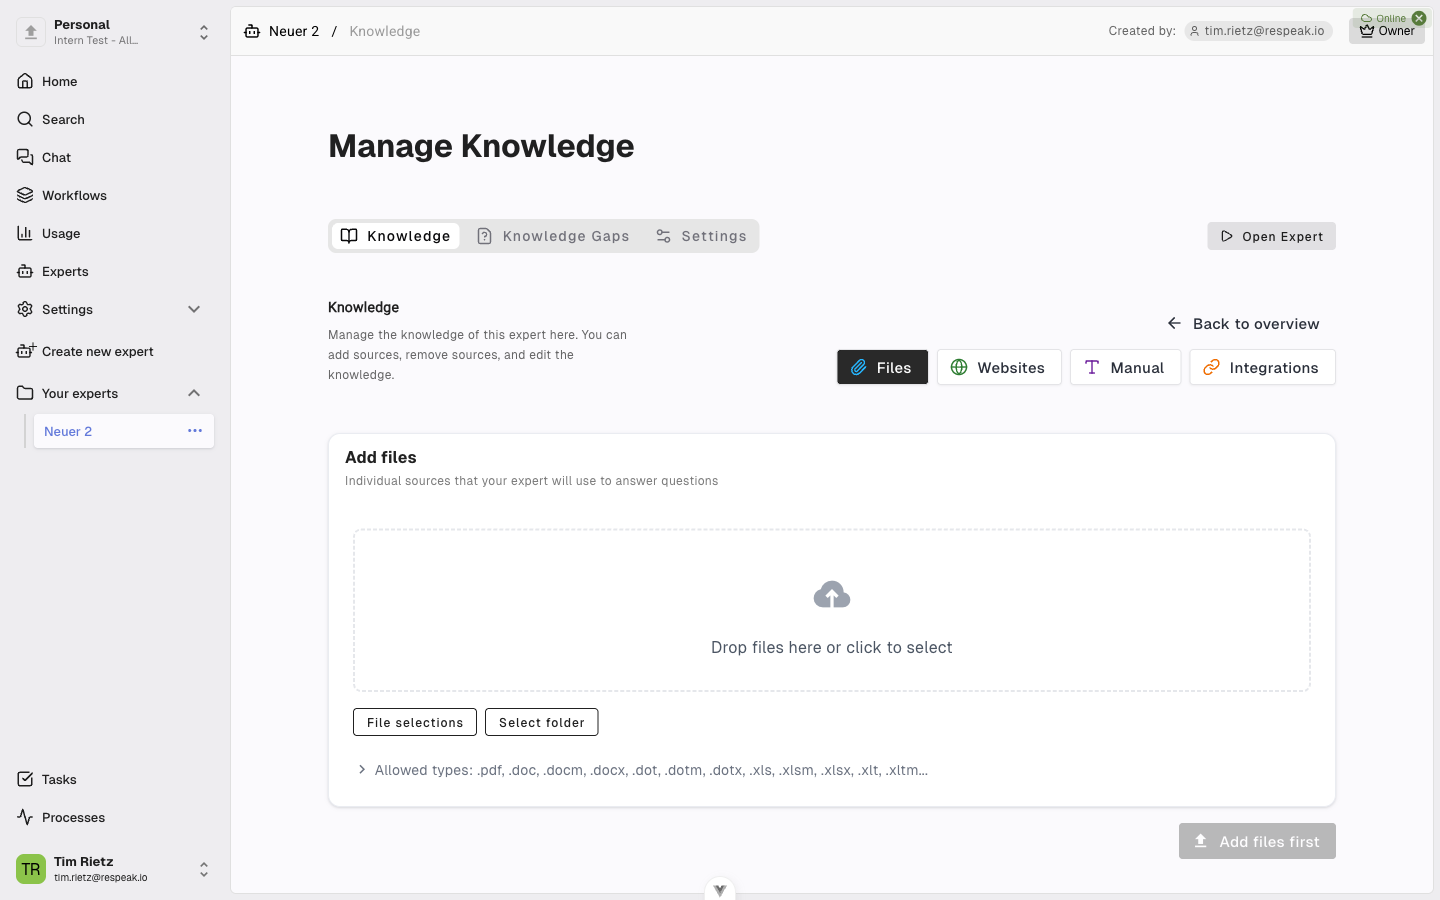
How to Get to the Files Section
Open your expert
Open your expert and go to Settings > Knowledge.
Select files
Click the Files button.
Add Files
You have two ways to add files: drag your files via Drag & drop into the marked area, or click the area to open your computer's file dialog. You can add multiple files at once.
Supported file formats
Respeak supports a wide range of formats:
Category | Formats |
|---|---|
PDF documents | |
Microsoft Office | .doc, .docx, .xls, .xlsx, .ppt, .pptx |
Text files | .txt, .rtf, .md, .csv, .json |
Images | .jpg, .jpeg, .png, .gif, .bmp, .tiff, .heic, .svg |
Audio | .mp3, .wav, .m4a, .ogg, .flac, .aac, .opus, .wma |
Video | .mp4, .mov, .avi, .mkv, .webm, .wmv |
Emails | .eml, .msg |
Web formats | .html, .htm, .xml, .epub |
OpenDocument | .odt, .ods, .odp |
Other | .zip (extracted automatically), code files (.py, .js, .java, etc.) |
Upload Options
Depending on the type of files you upload, additional options may appear automatically.
Extract images - When uploading documents such as PDFs or Word files, you can enable this option. It extracts images from the document and processes them separately, so your expert can also use content from charts and diagrams.
Force OCR - This option is helpful for documents that are not machine-readable, for example scanned pages or very old documents. OCR (optical character recognition) converts images of text into readable text.
The Force OCR option can significantly increase processing time. Only use it when the text in the document cannot be read normally.
Fast media processing - When you upload video or audio files, this option appears. It processes your media immediately instead of placing them in the regular batch queue, giving you faster results.
What Happens After Upload?
Start the upload
Click Add files to start the upload.
Wait for processing
Processing begins automatically and you can track the progress. The process overview shows a pages per second metric while documents are being processed - useful for estimating how long larger batches will take. Audio and video files are automatically transcribed - the spoken content is converted to text and made available to your expert as knowledge.
Done
Once processing is complete, the content is available to your expert as a knowledge source.
You can add more files at any time by clicking Add more knowledge.