Create Manual Entries
Write knowledge entries directly without uploading a file.
With manual entries you can add knowledge directly into Respeak without uploading a file or crawling a website. This is especially handy for short pieces of information, instructions, or additions that do not exist in any existing document.
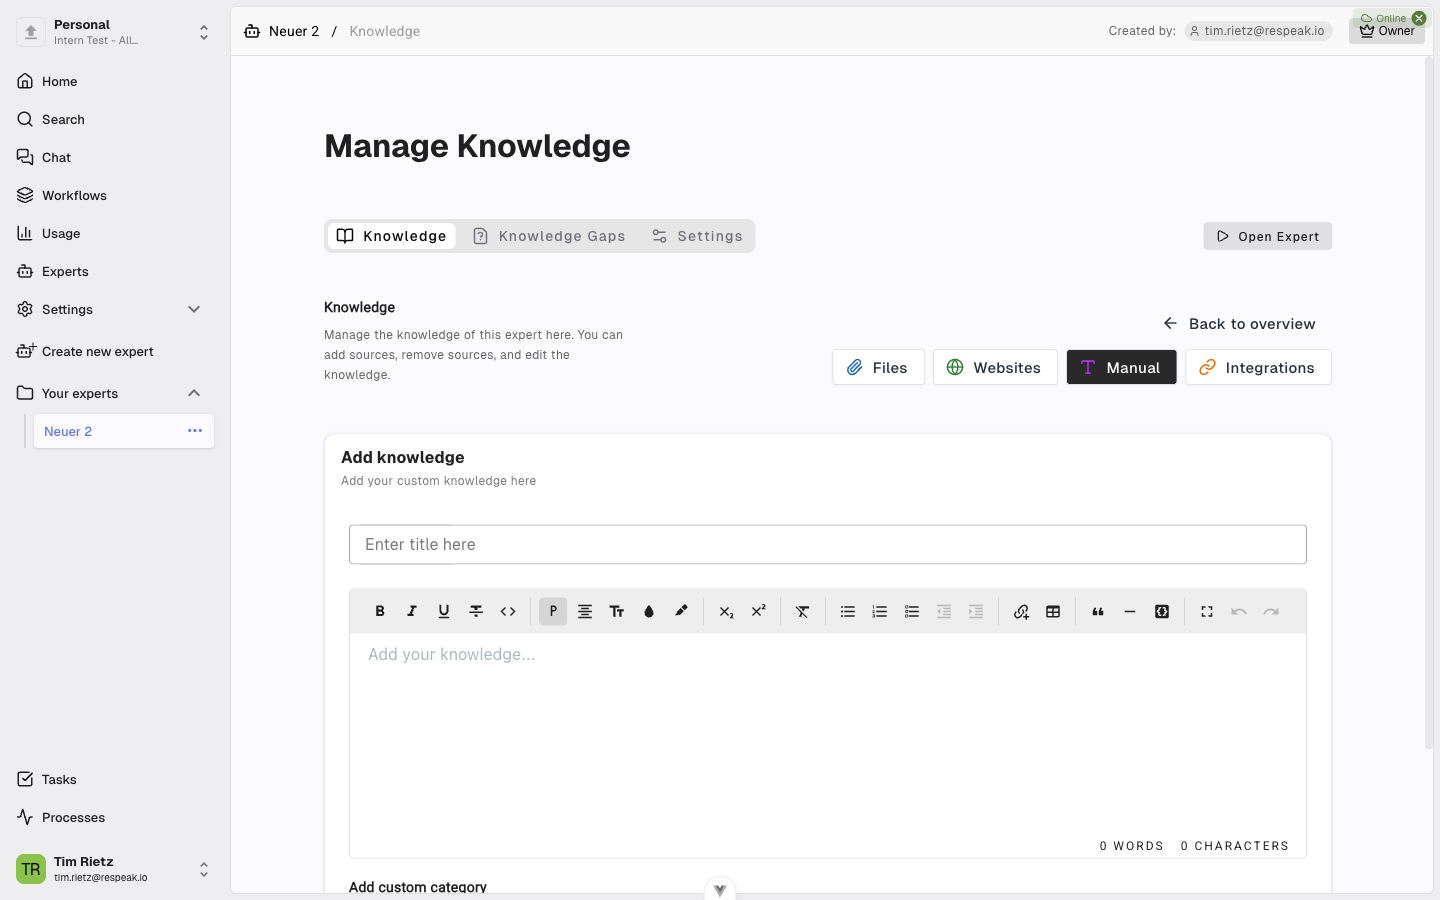
How to Get to the Manual Entry Section
Open your expert, go to Settings > Knowledge, and click the Manual button.
Create an Entry
Give it a title
Enter a descriptive title in the Title field. The title helps you find the entry later in the overview.
Write the content
In the text editor below, write the actual content. The editor supports formatting such as bold text, bullet lists, and headings, so you can structure your information clearly.
Add metadata (optional)
Below the text editor you will find the Metadata section. Here you can add extra information: Keywords assign categories or terms to make the entry easier to find. Versions let you specify which product or document version the content relates to. Date ranges define the period during which the information is valid. These fields are optional, but they help your expert find the most relevant information when answering questions.
Save the entry
Click Upload your knowledge to save the entry. It is processed automatically and added to your expert as a knowledge source.
If you want to create another entry right away, click Add more knowledge.
When Are Manual Entries Especially Useful?
Manual entries are perfect for frequently asked questions (FAQ), where you can write answers to recurring questions directly into the expert. They also work well for internal policies that do not exist in a formal document, for corrections and additions to information that is missing or outdated in existing documents, and for capturing expert knowledge - experience and tips that only certain team members know.