Submissions Workflow
Receive, categorize, and respond to public submissions and objections by email.
The Submissions workflow is built for organizations that handle large volumes of citizen input — public consultations, objections to planning procedures, customer feedback campaigns, and similar use cases. It captures incoming submissions (by email or upload), automatically categorizes them, extracts the sender's contact details, and gives you a dashboard plus a mail-merge export so you can write replies at scale.
Preview feature. The Submissions workflow is in active development. Details may still change based on real-world use, and feedback is very welcome — let us know what works, what doesn't, and what's missing.
When to Use It
Pick the Submissions workflow when:
You expect a steady stream of inputs over days or weeks (not a one-off batch).
The senders are people writing in free text — not a fixed form.
You need to keep track of case status (new, in review, responded) and assign cases to staff.
You want to send back personalized replies based on the topic of each submission.
If you just need to classify a one-off batch of documents, the standard Categorization or Categorization/Extraction workflow is a better fit.
Setting Up
Open Workflows
Open Workflows from the main menu and pick Submissions.
Create a configuration
Click New Configuration. Give it a descriptive name (e.g. Wind farm planning 2026 — public objections), an optional description, and the language of the incoming submissions.
Define your categories
Add the topics you expect — these are the buckets the AI will sort submissions into (e.g. Noise protection, Shadow flicker, Traffic). A short description per category helps the AI tell them apart.
Configure email intake
A unique workflow email address is generated automatically. Edit the prefix to make it memorable, set who is allowed to send (workspace domain, an explicit list, or both), and choose how results should be delivered. See Set Up a Workflow for the full email options.
Allow attachments (optional)
Enable Allow attachments if you want PDFs, scans, and other files attached to incoming emails to be parsed and included in the submission text.
Save
Click Save. Your configuration appears in the Configurations list, ready to receive submissions.
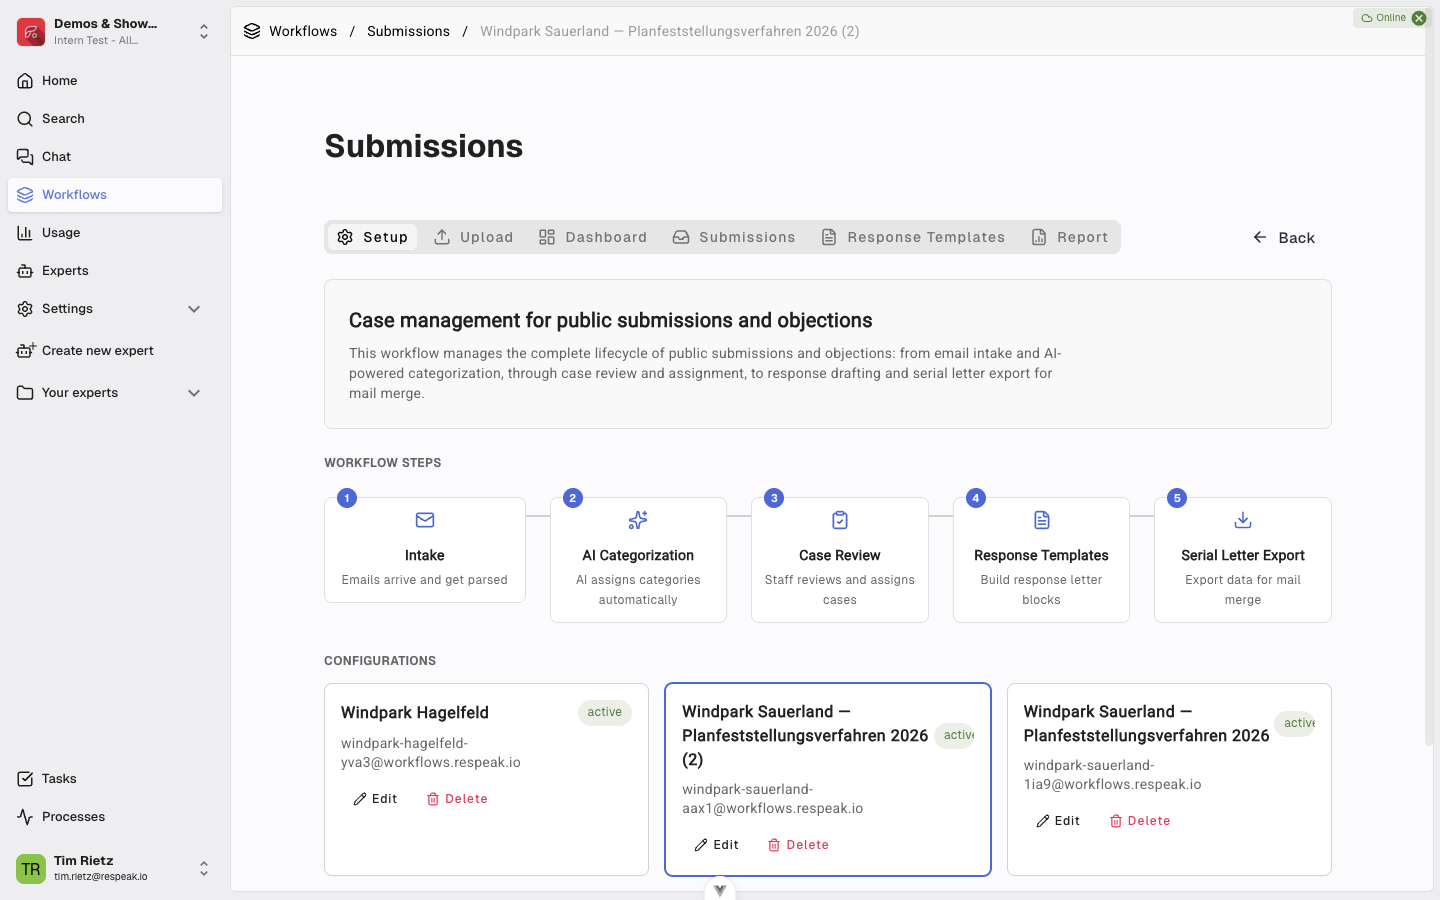
Receiving Submissions
Submissions can arrive two ways:
By Email
Anyone authorized can send an email to the workflow's address. Body and attachments are processed automatically — sender contact details (name, organization, address, phone) are extracted, the topic is categorized, and the submission appears in your dashboard within seconds. Forwarded emails are automatically unwrapped, so the original sender is captured rather than the person who forwarded it. Identical content is flagged as a duplicate so you don't process the same input twice.
By Upload
Use the Upload tab to drop in scanned letters or other files. Each file becomes one submission and is processed in the same way as an emailed one.
The Dashboard
The Dashboard tab gives you the high-level picture of what's coming in.
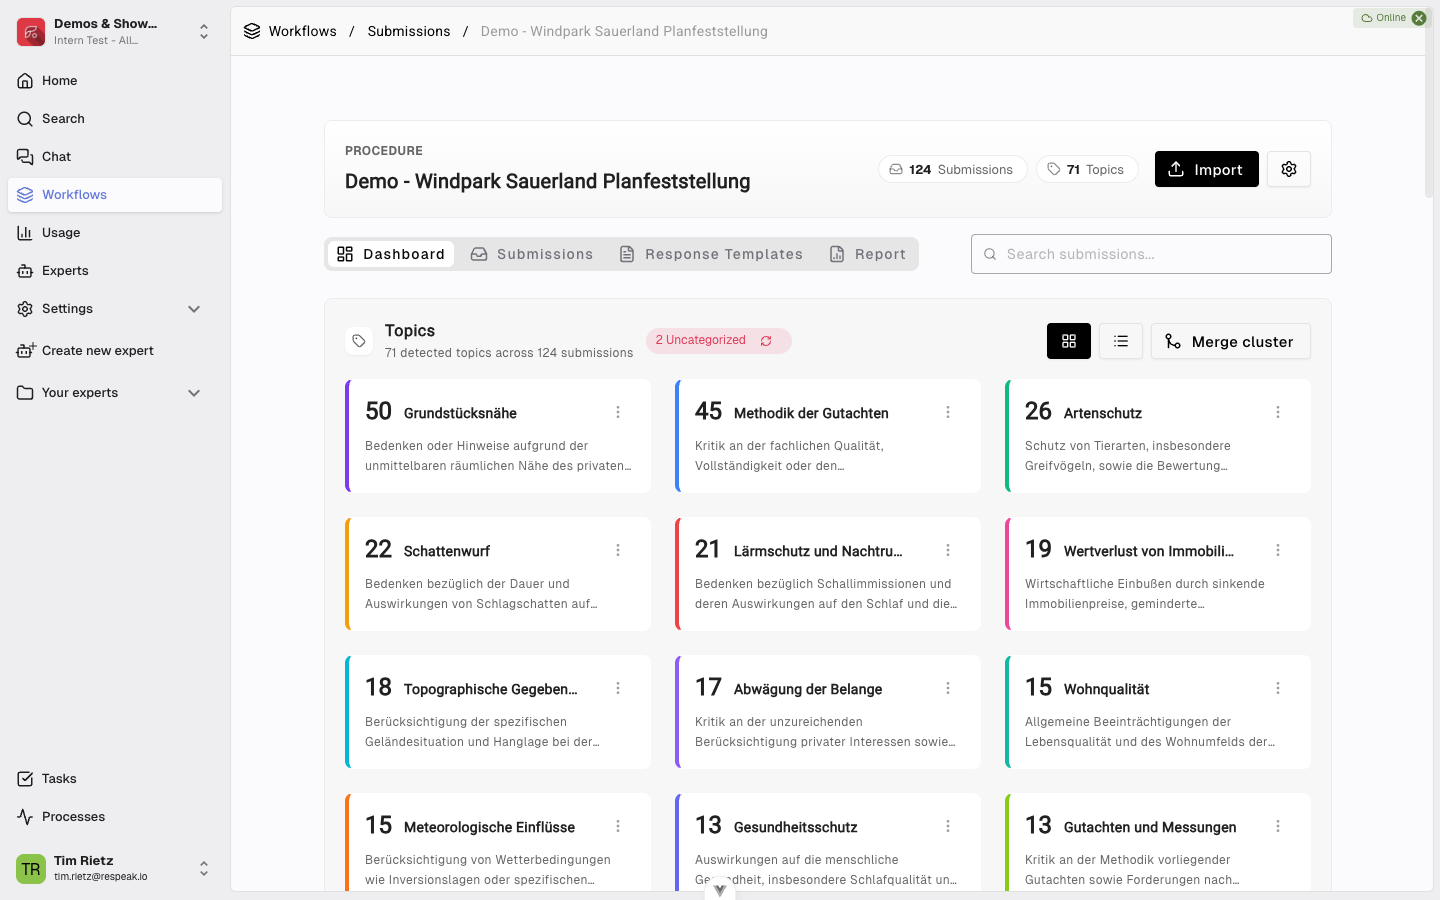
At the top you'll see counts for Total Submissions, New / Open, Responded, and Uncategorized. Below that, the Topic Distribution donut chart and the timeline of submissions per day make trends obvious at a glance. The Categories section lists every category with the count of submissions in it — click a card to drill into just those submissions.
From the dashboard you can also clean up your category list as the picture clarifies:
Rename a category to better match how submissions actually came in.
Merge two or more categories into one when you realize they're really the same topic.
Delete a category — its submissions become uncategorized.
Use Retry categorization to rerun the AI on uncategorized submissions after you've adjusted your category descriptions.
Working Through Cases
The Submissions tab is your work queue. Each row shows the sender, subject, received date, current category, and case status. Use the search and filter controls to narrow down the list, then click a row to open the Submission Detail dialog.
The detail dialog gives you everything in one place: the parsed sender contact data, the original content (with attachments), the AI-assigned category, and controls to adjust the category, change the case status (New, In Review, Responded, No response needed, Archived), and assign the case to a team member.
When the AI is unsure about a category, the submission is flagged as Suggested — review the suggestion and click Confirm or pick a different category to change it to Confirmed.
Response Templates
The Response Templates tab lets you build reusable letter blocks per category, with placeholders for sender data. You'll typically have one template per major category (e.g. one response to Noise protection, one to Shadow flicker) so you can answer many similar submissions consistently.
Create a template
Click Create Template, enter a name, pick the categories it applies to, and write the body — use placeholders like {{sender_name}} or {{address}} to insert sender data when the template is used.
Save
The template appears in the list and can be edited or deleted at any time.
Reports & Exports
The Report tab is where the workflow pays off. It produces two kinds of output:
Summary report — an HTML page (printable to PDF) summarizing all submissions: counts by category, examples per category, and totals. Useful for internal reviews and decision memos.
Mail-merge export — a CSV or XLSX data list plus a Word template with mail-merge fields filled in. Drop both into Word's mail merge feature and you can produce a serial letter answering every selected submission, personalized with the sender's contact data and the matching response template. Filter by case status before exporting if you only want to answer, say, the new cases. Toggle Exclude sender data to anonymize the export when you only need the content (e.g. for internal analysis).
The Word template, the data list, and the response templates work together: the data list feeds sender names and addresses into the merge, while the response templates provide the actual letter body keyed by category. You set this up once in Word, then re-run it for each batch of submissions.