Set Up a Workflow
Create and configure a workflow with categories and fields.
Before you can process documents, you need a configuration. A configuration defines how the AI should handle your documents. You can create as many configurations as you like and use them for different purposes.
Create a New Configuration
Open Workflows
Open Workflows from the main menu.
Choose a workflow type
Select the workflow type you need (e.g. "Categorization", "Extraction", or "Categorization/Extraction").
Create the configuration
Click New Configuration. You will be taken to the setup page.
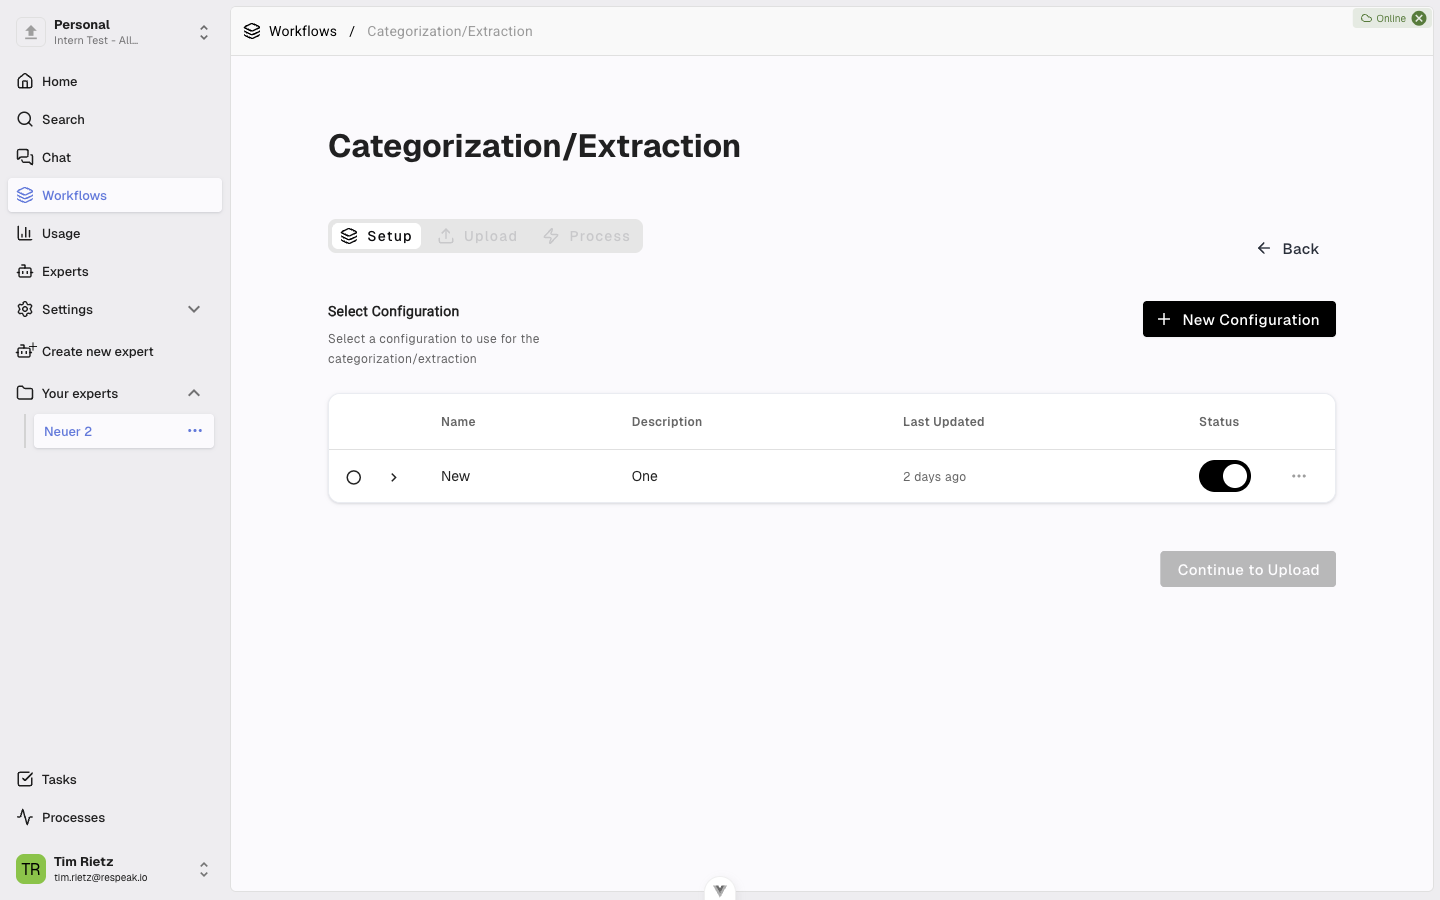
Basic Settings
Start by entering the general information: a descriptive Name (for example "Incoming Applications Q1"), an optional Description to help you find the configuration later, and the Language of your documents. The AI works more accurately when the correct language is set.
Set Up Categorization
If your workflow includes categorization, expand the Categorization section.
Add Categories
Create a new category
Click Add Category (the first time it will say "Create your first category").
Describe the category
Enter a name for the category (e.g. "Invoice") and add a description so the AI understands what belongs in this category (e.g. "Documents that contain a payment request with an invoice number").
Pick a color and save
Choose a color - this helps you spot categories at a glance in the results table. Then click Save.
Repeat this for all the categories you need.
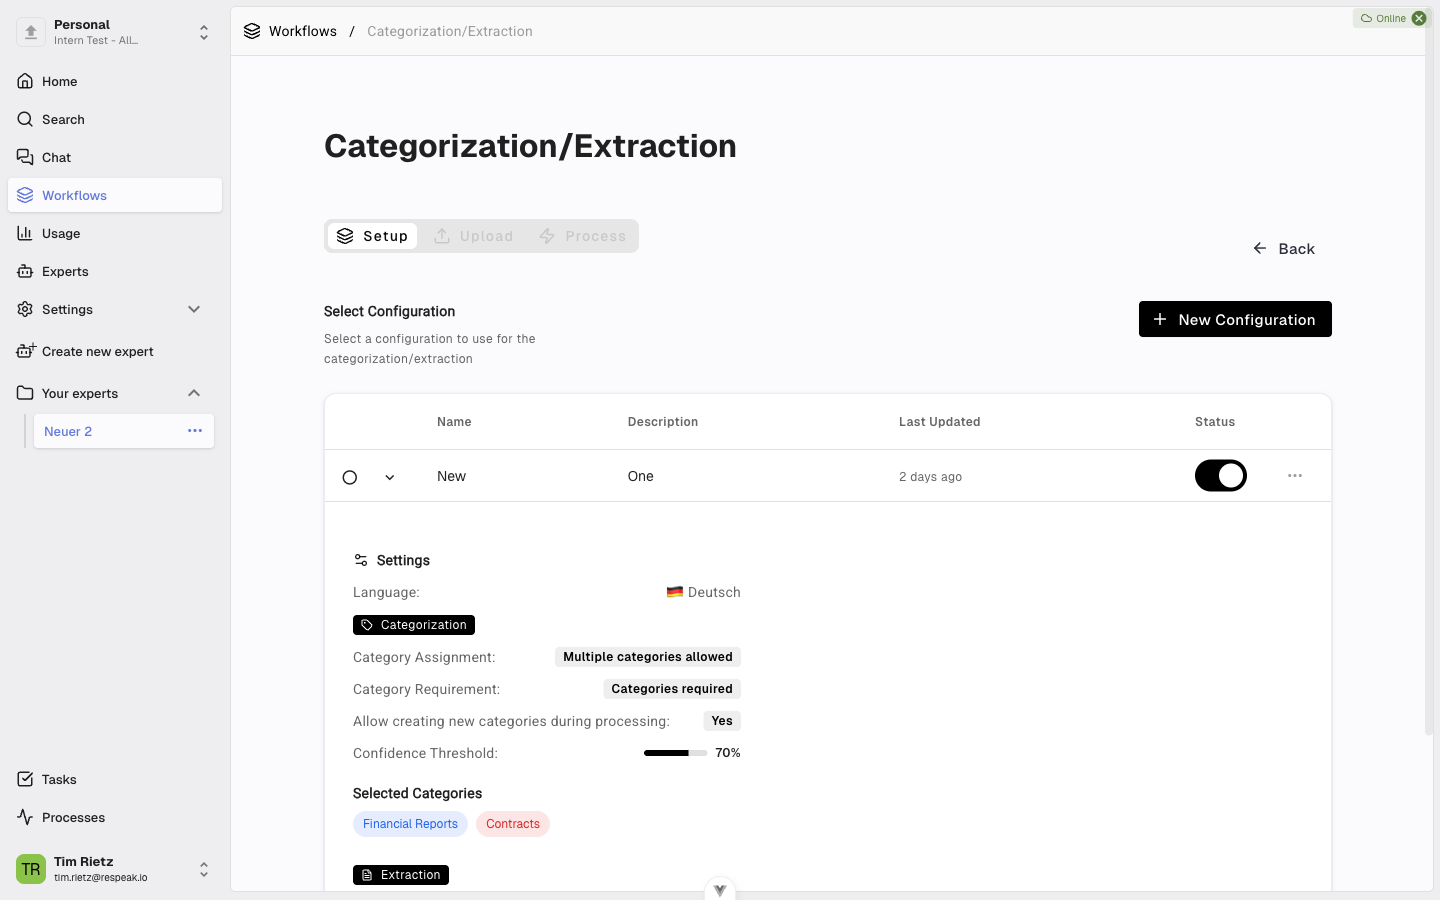
Subcategories
You can organize categories hierarchically. Open the menu of an existing category (three dots on the right) and select Create subcategory. The subcategory appears indented below its parent.
Select Categories
In the category table, use the checkboxes to choose which categories should be active for this configuration. Selecting a parent category automatically activates all its subcategories as well.
Adjust Settings
Under Settings you will find additional options:
Allow creating new categories during processing - When enabled, the AI can suggest new categories if a document does not fit any existing category. You can enter a Context for the AI that describes what your documents are about.
Advanced Settings
Under Advanced Settings you will find additional options:
Category Assignment - Choose whether the AI should assign exactly one category or multiple categories per document.
Category Requirement - Decide whether a category must always be assigned, or whether documents can remain uncategorized.
Confidence Threshold - Set how confident the AI must be before it assigns a category.
Click Save as default if you want to keep these settings for future runs.
Set Up Extraction
If your workflow includes extraction, expand the Extraction section.
Define Columns
Each column describes a piece of information the AI should extract from your documents.
Add a column
Click Add Column.
Enter name and description
Enter a name (e.g. "Amount" or "Sender") and add a description so the AI knows what to look for (e.g. "The total amount of the invoice in euros").
Choose a column type
Select the appropriate column type:
Type | Use for | Example |
|---|---|---|
Text | Words and sentences | Names, addresses |
Number | Numeric values | Amounts, quantities |
Date | Dates | Invoice date |
List | Multiple values | List of line items |
Save
Click Save. The columns you have created appear in an overview and can be edited or deleted at any time.
Test Your Configuration
Before processing a full batch of documents, you can test your settings:
Open the test section
Expand the Test configuration section.
Enter sample text
Paste a sample text - for example the content of a typical email.
Review the result
Click Test. The AI shows you which categories it would assign and what data it would extract.
If the results are not what you expected, adjust your categories, columns, or AI context and test again.
Email Settings (Optional)
Every workflow configuration has its own dedicated email address. Anyone authorized can send a message to it and the workflow runs automatically — body and attachments are processed exactly as if you had uploaded them through the Upload tab. This makes it easy to wire up the workflow to a public inbox, a forwarding rule, or a script that just sends emails.
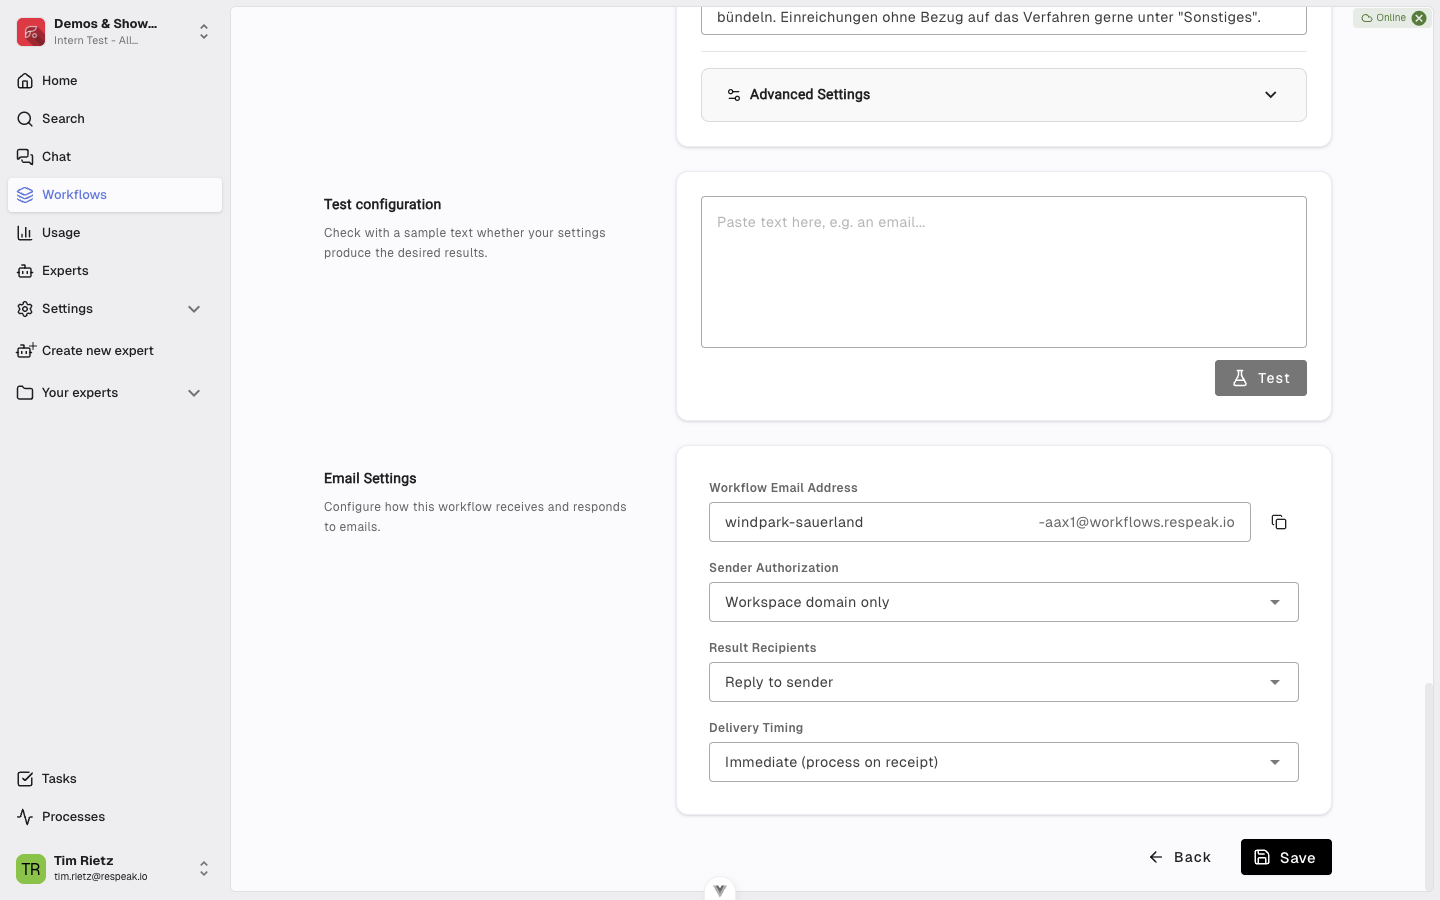
Workflow Email Address
The address is generated automatically when the configuration is created. Edit the prefix (the part before the @) so the address is easy to remember and reflects the purpose of the workflow. Click the copy icon to copy the full address to your clipboard.
Sender Authorization
Choose who is allowed to send to this address:
Option | Who can send |
|---|---|
No restriction | Anyone with the address |
Workspace domain only | Only addresses on your workspace's email domain |
Allowed senders list only | Only addresses you list explicitly |
Workspace domain AND allowed senders list | Either of the above |
When the allowed senders list is part of the choice, an additional Allowed Senders field appears where you type each address and press Enter to add it.
Result Recipients
Choose how the workflow should reply when a run completes:
Option | Behavior |
|---|---|
Reply to sender | The workflow result is sent back to whoever sent the email |
Configured recipients only | Results go to a fixed list you maintain |
Reply to sender AND configured recipients | Both |
Don't send replies | Results are stored but no email is sent |
When configured recipients is part of the choice, an additional Configured Recipients field appears for the recipient list.
Delivery Timing
Decide when results should be sent:
Immediate — process and reply as soon as the email arrives.
Scheduled — collect emails and process them as a batch on a schedule (daily or on a specific weekday). Useful when you'd rather receive a digest than a stream of individual replies.
Save Your Configuration
Once you have completed all settings, click Save at the bottom. Your configuration now appears in the configuration table and can be selected for document processing.
You can edit a configuration at any time by clicking the menu (three dots) in the table and selecting Edit. Use the toggle in the Status column to activate or deactivate a configuration.